Zendesk Conversations
Integrate with Zendesk Conversations to enable bidirectional chat between chatbot users and Zendesk agents
Integrate with Zendesk Conversations to enable bidirectional chat between your chatbot users and Zendesk agents. When a user requests a human agent or shows signs of frustration, the conversation is automatically escalated to a Zendesk agent. Messages are forwarded in both directions, and the session resolves when the agent releases control.
Connector Settings
| Field | Value |
|---|---|
| Integration Type | Zendesk |
| Subdomain | Your Zendesk subdomain (e.g., your-company from your-company.zendesk.com) |
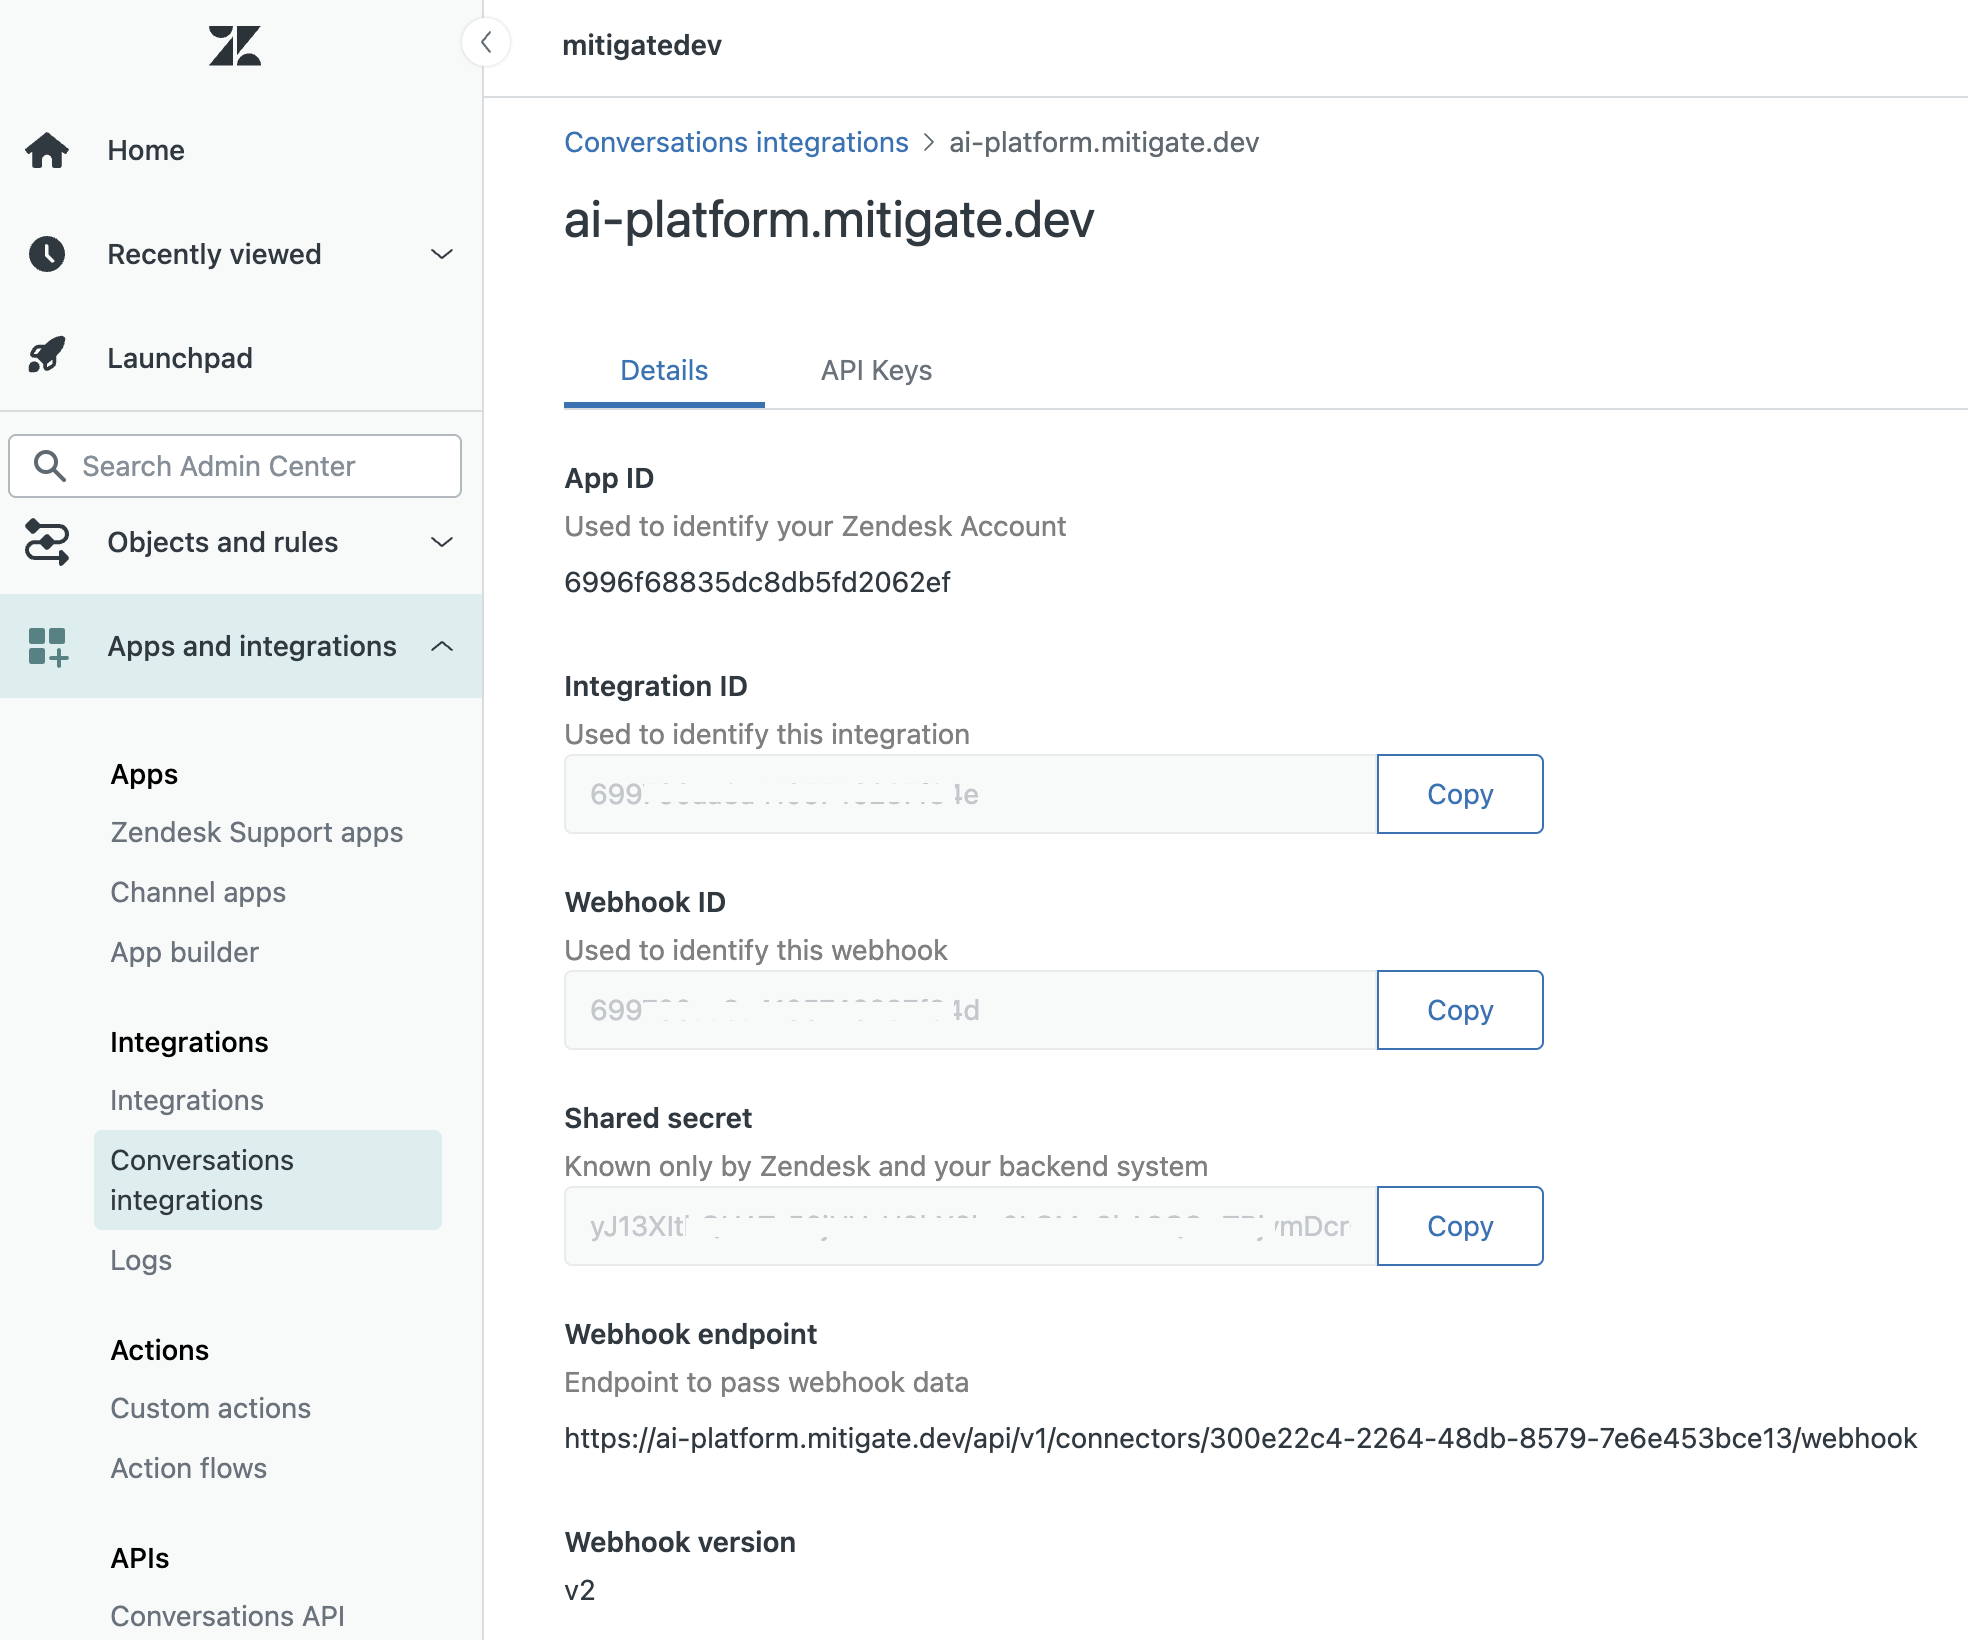
| App ID | Conversations App ID |
| Key ID | API key ID for authentication |
| Key Secret | API key secret for authentication |
| Webhook Secret | The secret you configure on the Zendesk webhook |
Prerequisites
- A Zendesk account with Conversations Integration enabled
- API keys for Conversations Integration (key ID and secret)
- The Conversations Integration App ID
Zendesk-Side Setup
1. Create a Custom Integration
- In Zendesk admin panel, navigate to Apps and integrations > Conversations integrations
- Create a new Conversations Integration
- Note the generated App ID — you will need it later
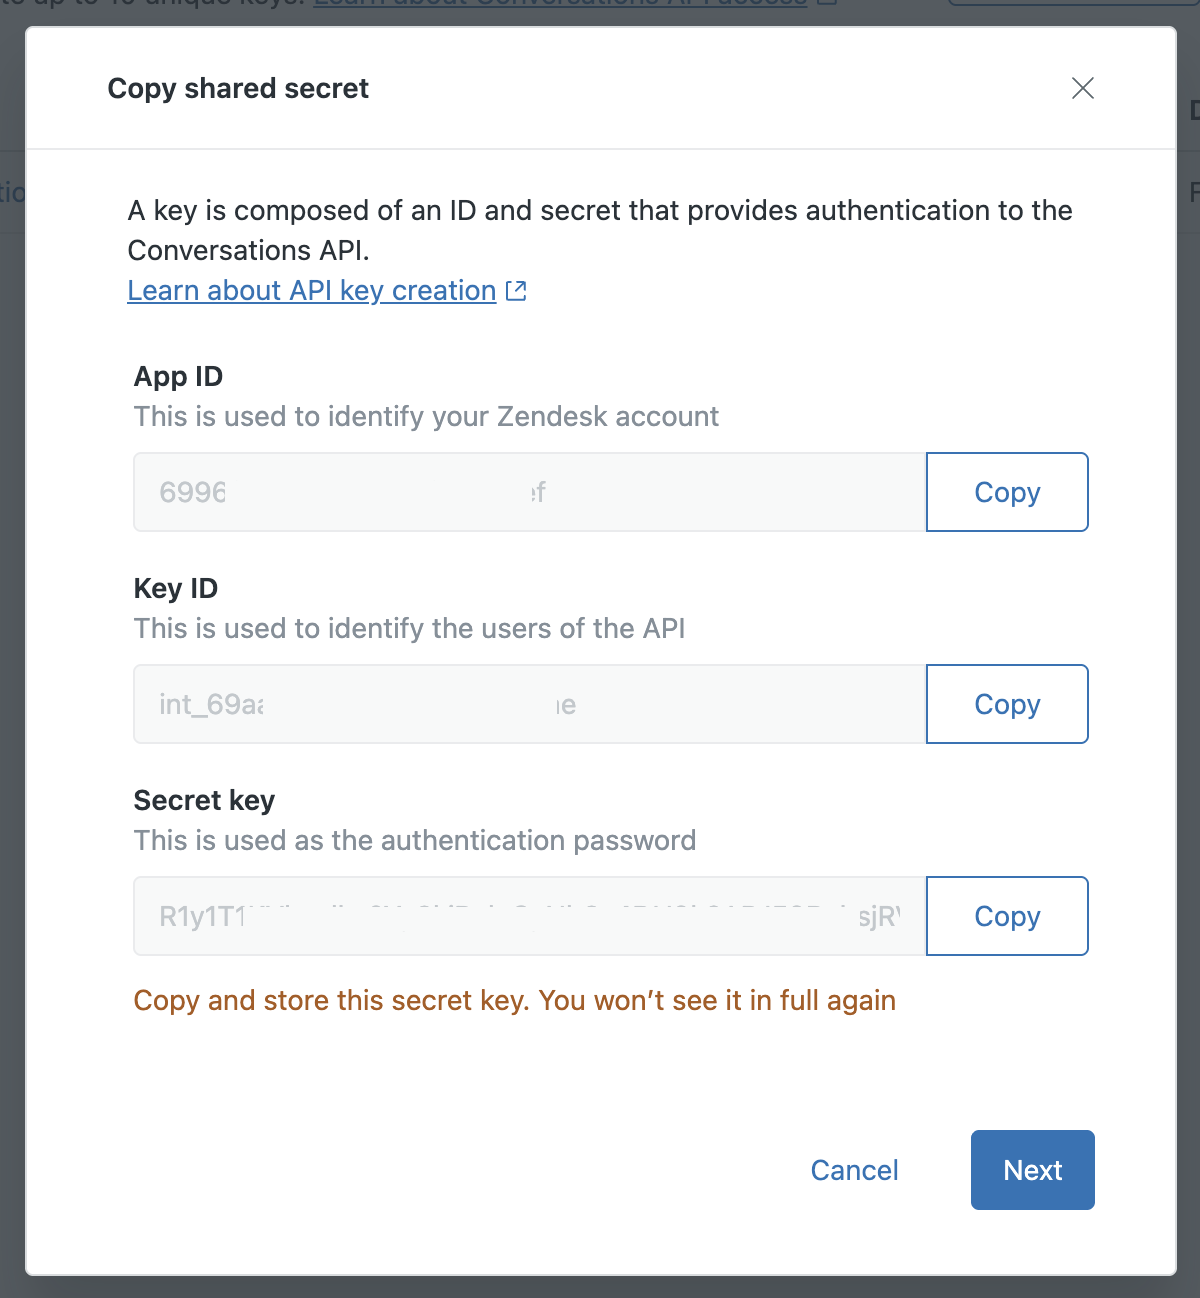
2. Generate API Keys
- Go to Conversations integrations > Your new integration > API Keys
- Create a new API key
- Save the Key ID and Key Secret — the secret is only shown once
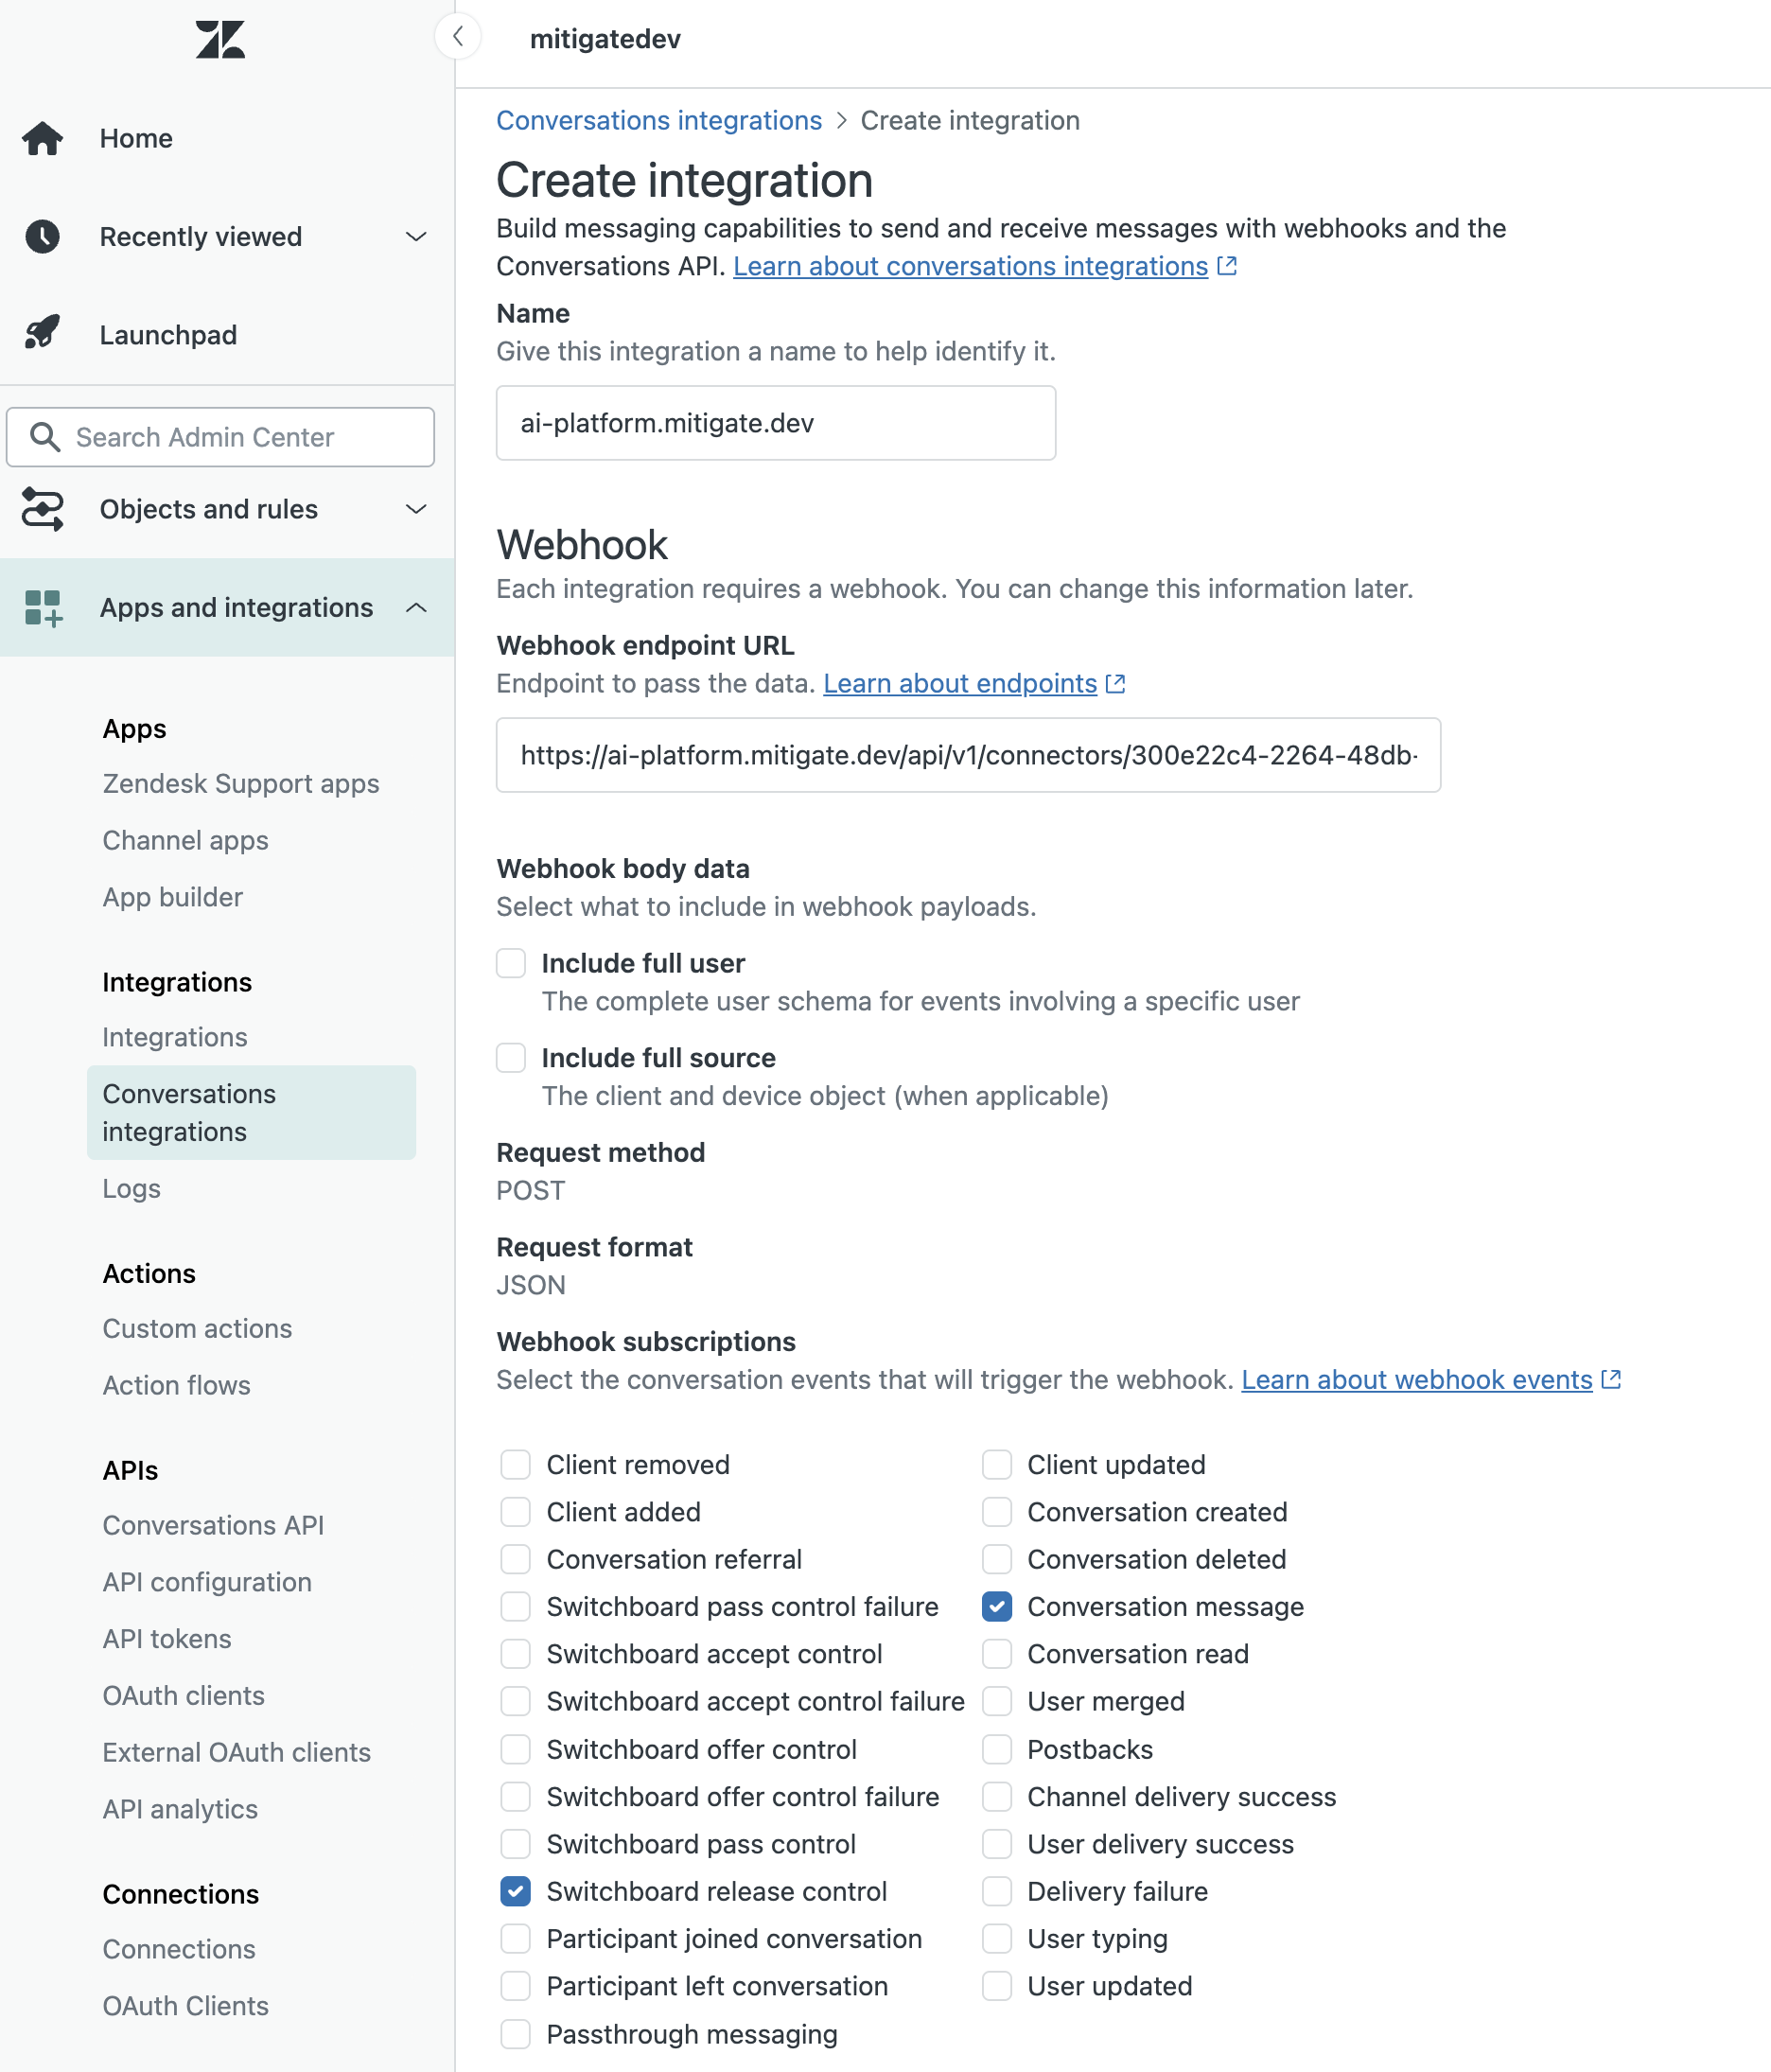
3. Configure a Webhook
-
Navigate to Conversations Integration > Your new integration > Edit
-
Fill in the webhook pointing to your connector's webhook URL (shown on the connector detail page after creation):
POST https://your-app-domain.com/api/v1/connectors/{connector_id}/webhook -
Select the following triggers:
- Conversation message
- Switchboard release control
Application-Side Setup
- Go to Admin → Connectors
- Click Add Connector
- Select Zendesk (Conversations API) as the Integration Type
- Fill in the following fields:
| Field | Description |
|---|---|
| Name | A descriptive name for this connector |
| Subdomain | Your Zendesk subdomain (e.g., your-company from your-company.zendesk.com) |
| App ID | Conversations Integration App ID |
| Key ID | API key ID from the Conversations Integration |
| Key Secret | API key secret from the Conversations Integration |
| Webhook Secret | The API key you set on the Zendesk webhook (used to verify incoming requests) |
- Select Workspaces to assign the connector to
- Click Create connector
- On the connector detail page, copy the auto-generated Webhook URL and use it when configuring the webhook in Zendesk
Each workspace can have its own Zendesk connector with separate credentials and webhook URL. This allows different workspaces to escalate to different Zendesk accounts or integrations.
How It Works
Escalation
When a user requests a human agent or shows signs of frustration, the chatbot automatically:
- Summarizes the conversation so far
- Creates a user and conversation in Zendesk Conversations Integration
- Sends the summary as the first message so the agent has context
- Routes all subsequent user messages to the Zendesk agent
Message Forwarding
- User to agent — Messages sent by the user in the chat widget are forwarded to the Zendesk agent in real time
- Agent to user — Messages from the Zendesk agent are delivered to the user via the chat widget, including text, images, and file attachments
Session Resolution
When the Zendesk agent resolves the conversation (releases switchboard control), the user is notified that the human support session has ended and user should start a new conversation.
Webhook Endpoint
POST /api/v1/connectors/{connector_id}/webhookThe endpoint accepts Zendesk Conversations Integration webhook events. Authentication is performed via the X-API-Key header, which must match the configured webhook secret.
Supported events:
| Event | Description |
|---|---|
conversation:message | Forwards agent messages to the chat user |
switchboard:releaseControl | Marks the Zendesk session as resolved |